How to Publish a Post and Upload a Trek on Trailaider App
Trailaider not only allows you to create fitness courses for trekking but also allows you to share your stories in the form of a post within the app. Trailaider app users can share product reviews, trek reviews, or anything that would help other trekkers in the app.
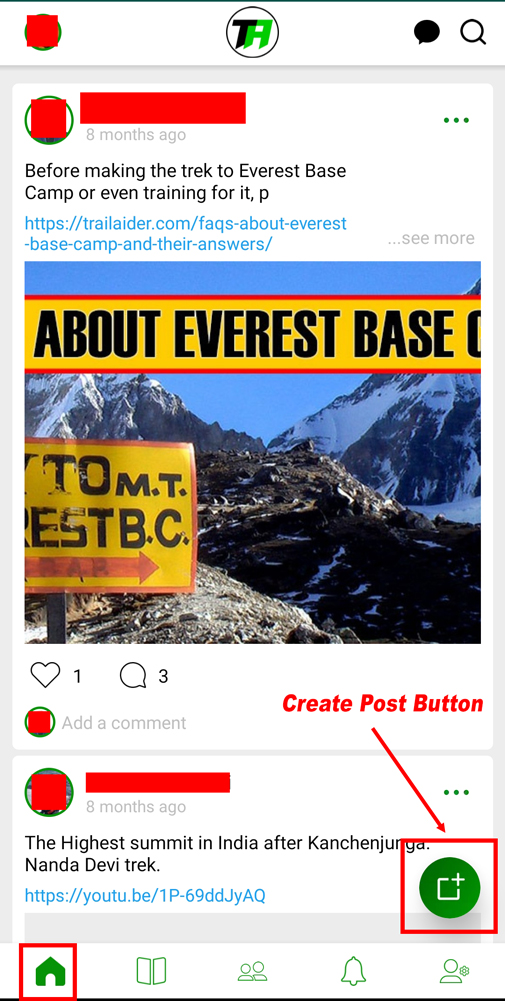
Step 1
This is the home page screen where all the posts are listed. The button at the bottom right side of the screen, you see the ‘Create Post’ button. Tap the button, and the app will take you to the ‘Create Post’ page.
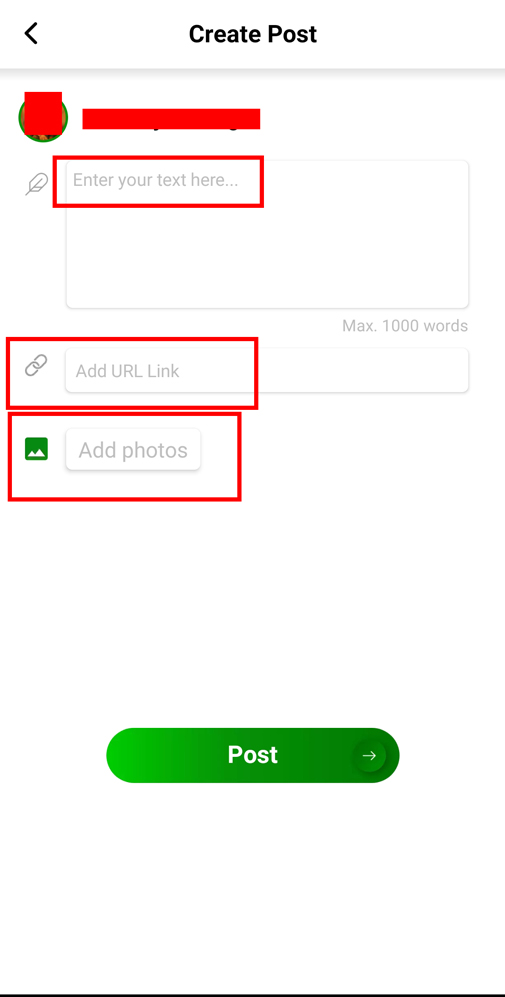
Step 2
The create post page allows you to enter the text of the post you want to share, a link of a product if any, and photos either directly from the camera or your gallery. Simply tap on the post button after filling all the fields and your content will be displayed on the home page. You can choose the privacy setting of the posts from the profile.
How to Upload a Trek in Trailaider App
It is great to keep a log of all the treks you have been to. Trailaider gives you that option in simple steps.
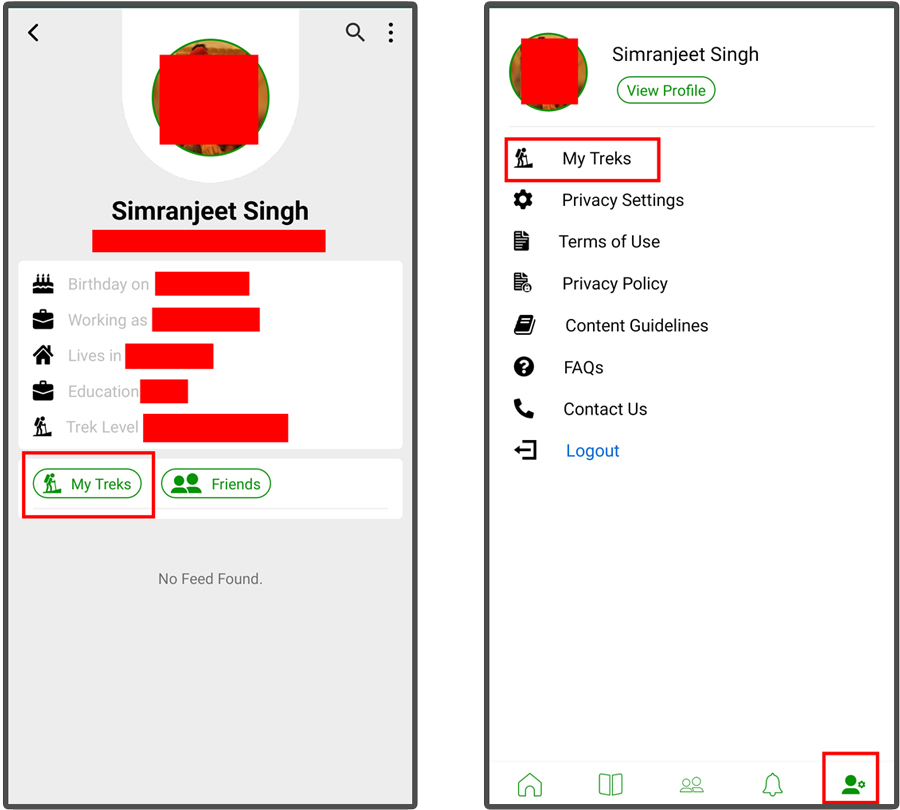
On the profile page and settings page, you see the option of ‘my treks’ that takes you to the page where all your treks are listed.
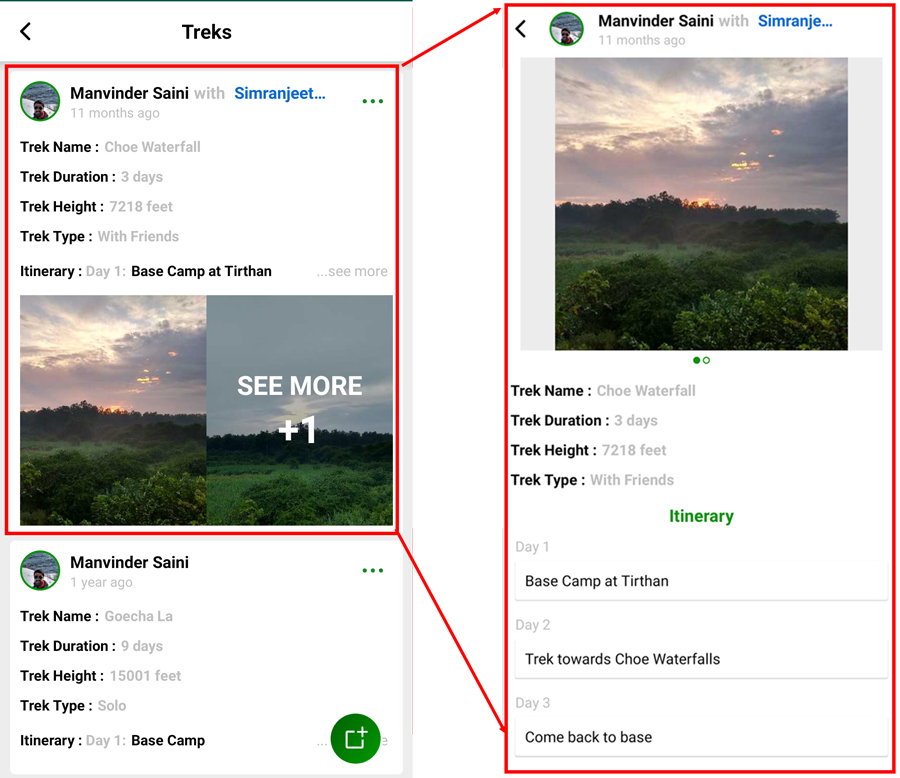
Here’s how the trek listing page displays the trek. You can tap on every single trek to see the expanded and detailed view of each trek.
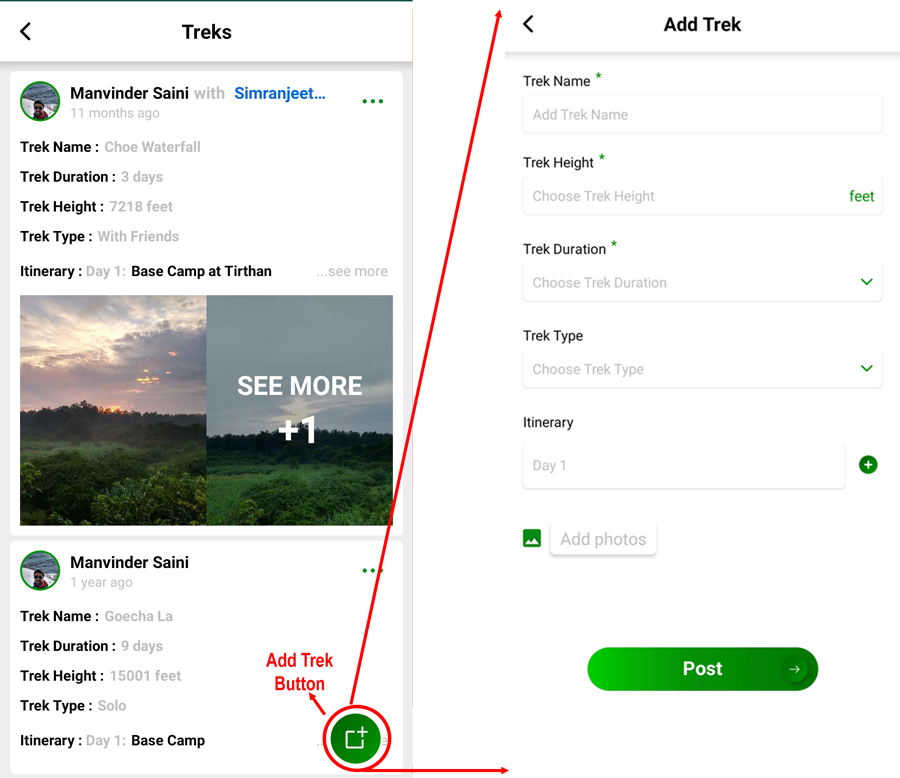
To add a new trek, tap on the button on the trek listing page. See the below image.
Enter trek name, trek height, duration, Trek type (Solo, Friends, Company – if you went on the trek with friends and they are on Trailaider, you can tag them), itinerary, and photos, and simply tap on the post button to publish the trek.

You May Also Like